Monday, July 25, 2011

Wyoming or Bust

I finished the girls' dresses for our epic trip out West.
Here is Sophia:
And Syrena:
And Naomi:
I was told after I made the dresses that they should wear long sleeves, so I guess my girls are going to be "sexy" pioneers.

The girls are very excited to be out under the big open sky for four days.
The have no idea that they will be hot, thirsty and sweaty. They will get blisters on their feet, sunburns on their noses, mosquito bites on their skins and they will have to eat food they aren't used to. Oh yes, and there will be no riding in the handcarts.


It will be good for them.


Come on, sisters, lets walk across the plains....
....or at least through this chigger-infested meadow.

They look much more pioneer-y in sepia:
See you in Wyoming.


Saturday, July 23, 2011

Blossoming Ballpoints

I have a magic drawer in my home. It is the pencil drawer of our computer desk. This is why it is magic:
I toss a couple sharpened pencils and ball point pens in the drawer. I close the drawer. I go about my normal mother-jobs. Then, when all the sudden I need to write something extremely important down--quick--I open the drawer to locate a writing utensil. And what do I find? Broken tipped pencils, yellow crayons and no ball point pen in sight. This happens all the time! Arg! Do you have a magic drawer in your home?

My kids' second grade teachers must have a magic drawer in their desks too, because they make these flower pens.
They had their students make them for Mothers Day gifts, and I can tell you right now it is the best Mothers Day school present I've ever received.


Mothers Day was back in May, now it is July. Do you realize that means I have kept track of my flower pens for FOUR MONTHS now?

Like I said, best Mothers Day gift ever.


(It turns out that we could have been even more creative with this craft--we went to REI last night and they had a pen with a big long fern frond attached to it. )


Thanks, Ms. Benton and Mrs. Cheek!

Monday, July 18, 2011

Calling All Pioneers

Does anyone know where Sophie is pointing?


You are exactly right. It is the middle of nowhere.
But this spot has great significance to my family. It is the place where Scott's ancestors were stranded with their handcarts; caught in an early snowstorm on their way to Salt Lake. They were starving, dying, eating the soles of their shoes and tree bark. But it was at this spot that help finally came. They were rescued. And who rescued Scott's dying ancestors?
Why, my ancestors, of course!

This summer my mom and her husband are serving a mission there and helping to build the new visitor's center. There is also a river there called the Sweetwater, and it is there, this August, that Sophie and Syrena are going to be baptized....pioneer style.

We've been preparing all summer by reading pioneer stories, making pioneer dresses (which will be posted soon) and doing pioneer crafts to help us get into the spirit. Last week we made our own butter by pouring whipping cream and a little salt into jars. Then we went outside and rolled the jars back and forth to each other. We told stories. When that got boring we rolled the jars down grassy hills. It was hot. It was hard. It was grueling. But after about a half hour we had our own delicious butter:

Mmmm.....fat.


Afterwards Sophie proudly proclaimed, "Everything homemade is always better!"

I hope she still says that when I finish her pioneer dress...

Friday, July 8, 2011

Pizza Party, Mermaid Style

I told the mermaids that we were making a pizza for our craft this week and you would have thought I had told them we were going to burn all their toys.


You see, my girls hate pizza, a fact which used to turn every birthday party they were invited to into an absolute tragedy. But as they get older, they are getting better at declining the pizza with a polite, "No thank you. I don't eat pizza."
This, however, gives the impression to the other parents at the party that Mormons don't eat pizza, which of course is not true. Unless the pizza is laced with coffee, tea leaves, alcohol or ecstasy, that is.

You can imagine the relief on my girls' faces when I told them that we were going to making fruit pizza. Ahh...the world has righted itself again. Now this was something they could handle.
I have a wonderful recipe that I discovered years ago which was instrumental in getting my husband to fall in love with me,


and, because you were so nice to stop by and read my blog, I will share it with you.


Fruit Pizza
Crust:
1 c. marg/butter
1 1/2 c. sugar
1 egg
1 tsp. vanilla
1/2 tsp. almond extract
2 1/2 c. flour
1 tsp. baking soda
1 tsp. cream of tartar

Mix butter, sugar, egg, vanilla and almond extract. Cream. Add all other ingredients. Press into the bottom of a pizza pan or cookie sheet. Bake 375 for 12 minutes.

Pizza "Sauce":
8 oz. cream cheese, softened
1 c. cool whip
1 1/2 powdered sugar
Blend together and spread on cooled crust. Top with fruit (berries, mandarine oranges, pineapple etc.)


PS While watching the credits after the last Pirates of the Caribbean movie I saw that the mermaid (the not-so-scary one) was named Syrena, and spelled the same way as I spell my daughter's name. I did a little research (i.e. googled) and found that there is a legend in Poland about a mermaid who wielded a sword and shield and protected the city of Warsaw. The mermaid's name was Syrena, and there is a bronze statue of her in the middle of the city. Who knew?

Saturday, July 2, 2011

A Disgusting Treat


This week we made "pupcicles" for our mer-dog, Jimmer, and our neighbor dogs. This is an easy, easy craft, but quite disgusting.

We used ricotta cheese and plain yogurt for the "base" of our pupcicles,
and rawhide strips for the pupcicle sticks.
Then we had a variety of nauseating mix-ins,
including mini pepperonis, dog jerky and dog food. You could also add cheese or peanut butter.

Mixed with the yogurt and cottage cheese, this craft thoroughly grossed-out everyone.

This photo just doesn't do it justice. You've got to smell it.

We invited our lovely mer-neighbor to join us.
Here she is, showing us what she thinks of this craft:

Here it is, all put together, ready to be frozen.

After mixing their pupcicles, the mermaids and mer-neighbor promptly fled.

I lined the treats up in the freezer:


The next day:
Mmmm....want some?

Let's see what Jimmer thinks.


I think he likes it!

We took the rest of the pupcicles to Jimmer's neighbors: Abby, Ollie, Finnie and Tango. None of them even hesitated scarfing the treat down.

And just in case this makes you think you really would love to have a dog that you could make pupcicles for, read this first.

Until next week!

Friday, June 17, 2011

A Marbleous Time

WELCOME BACK!
It is summertime again and that means the mermaids up to their crafty ways. Every week throughout the summer I will post one of our crafts for your viewing pleasure.
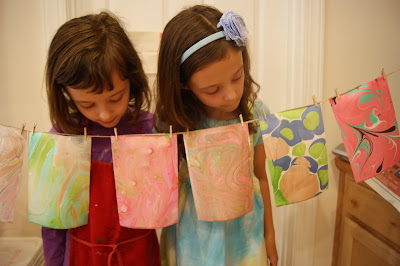
Here is a photo of our first craft:

Want to know how we did this? This is called paper marbling and it doesn't take a whole lot of special skill, but it does take some special ingredients and a fair amount of preparation.
The first ingredient is alum. This is a color binder. You have to first soak your papers in this and then dry them out and press them. The paper needs to be completely flat to marble correctly.
The next ingredient you need is carrageenan which is a powder made from seaweed moss. This is tricky to find. You can't find it at normal craft stores like Michaels or A.C. Moore. You have to go to more professional art studio stores or get it on line. Unfortunately no matter where you find it it will be a little bit pricey, but marbling will not work without it. For the precise measurements to mix the carrageenan go here. After you've mixed the carrageenan with water and put it in the blender you pour it into a tray where it can set over night.


After those first two items the rest is easy:
A pan or tray for the liquid,
a stack of your alum-treated paper,
a comb like this:
(I made mine out of wood and nails) or fork to spread the paint.
You will also need acrylic paints. (I used regular craft paint, but I had to water it down so that it was the consistency of orange juice or whole milk.)

Whew! The preparation takes a lot of work, but believe me, it is worth it.

Now for the actual marbling process:
1. Drip your paint into your tray with the carrageenan/water mixture.
If you've mixed the paint to the right consistancy it will float on surface and start to spread, making what marblers call "stones."

Keep dripping paint, adding more colors until you feel like stopping.
2. At this point you could lay down the paper right on these stones and you would get a really cool design that looks something like the paper on the right:
The paper on the left was made by swirling the stones around with a stick.
Another method is using a tool to "comb" the stones.
This makes the paint move into a feather like pattern, like this:


3. How ever you decide to marble, you can't mess up. Every pattern will turn out interesting. Now that you've arranged the paint the way you want it, carefully drop your paper on the surface of the water.
This is the exciting part. Wait for the edges to curl up and then gently pull if off and be amazed at the beautiful design you created.
Isn't this awesome? It is just like magic!
4. Now hang up your paper to dry.
After it is dry press it under some heavy books until it is flat. You can use your paper as wrapping paper, book covers, cards or whatever.


This was the most successful craft I have done with my mermaids. Everyone had a great time, and we never ceased to be amazed at the colors and variety of patters we made. I think the girls spent about two hours making more and more cards. The carrageenan mixture lasted for all of these cards, and we could have made many more. All you have to do is wipe the surface of the carrageenan with a strip of newspaper and you are ready to drip new stones. I was amazed that we could make light colored marbled cards even after we had marbled with black paint. This was so easy to do, even my four year old could easily create marbled paper all by herself.

After we were done the girls gave their patterns names like "swirled chocolate" and "seaside." Once they were dried and pressed we put them all in envelopes to use as cards. Maybe one day you will get one of our papers in the mail!